Thursday, October 29, 2009

Halloween Series - The Skull

Yesterday, we looked at The Rat as a Halloween themed cache.  Today, we are going to look at how to build a Skull Cache.  And this one definitely has some variety to it depending on what you use for the skull.

Required supplies:
  • Logbook
  • Micro Cache Container
  • Fake Skull
Optional supplies:
  • Power drill
  • Screweye
  • Fishing line/rope
Let's start with the skull itself.  There are a variety of skull products out there.  Hard plastic, soft plastic, foam, hollow, solid, and everything in between.  This will probably be the most important decision you make with this design.  What skull you use will define how to build the cache and how to hide it.  If you use hollow, all you need to do is open it up to hide the cache.  If you use a solid skull, you will have to drill.  That's where the power drill will come in.  If you use foam, you better be prepared to buy a lot of spares as the weather will ruin it.  Better yet, just stay away from foam.

Let's look at the container.  Again, a matchstick container works best but a 35mm can be used as well, just like with the rat cache.

Now for the hide.  The skull can provide some interesting ways to get creative with the hide itself.  You can use some of the common "in the woods" methods such as covering it with brush or finding a hole in a tree.  A more creative way involves hanging from something like a tree. Attach a screweye (for those unfamiliar with that, it's the screw that has the round loop at the top) to the top of the skull and then tie a line to that.  Attach the other end of the line to whatever object you are hanging it from and you now have a hanging skull cache.

In the end, it's a rather basic setup.  The key thing to consider is what kind of skull you want to hide.  That will help define how to build the cache.

TripCyclone

Tuesday, October 27, 2009

Halloween Series - The Rat

Wow, didn't realize it had been THAT long since my last article.  Well, I've been pretty busy between work and...well work.  But, I thought that as we approach Halloween in five days, I would do a series of quick articles on Halloween themed caches.  Most of these will be short articles and very similar to each other, but with slightly different props.  We'll start with a classic - THE RAT.

Building a rat cache is rather simple.  Here are the needed supplies:

  • Rubber rat
  • Micro Cache container
  • Logsheet
An optional supply would be some sort of adhesive.  That depends on the final design.  In the simplest sense, you will be attaching the container to the rat.  How you attach it will depend on the container used.  35mm film canisters work well, but waterproof matchstick container (easy to find among camping gear in stores) is better.  Mainly because the screw top and O-ring provide a more durable waterproof container (imagine that...a waterproof matchstick container being waterproof!) than a film canister, which can easily get smashed, broken, chewed on or have the lid pop off.

I've seen the attachment go several ways.  If you purchase a rat that is hollow, you can cut a hole on the belly and insert the container inside the rat.  If it isn't hollow, look to see if there is a space between the paws where you can slip the container (this might be where an adhesive would be valuable).  Unless it is a bigger rat, a micro is the best size for a container.

For hiding spots, try to find a good hole at the base of something, be it natural or manmade.  Up in a tree just seems less natural than on the ground.  Most of the time, the rats will be black or brown but I've seen white and gray ones before.  The darker ones will be easier to blend in, and if found in the dark, are more likely to startle someone.  The first time I saw a rat cache, it made me hesitate before reaching for because I was looking at night.

There you have it.  A simple halloween cache.  Next up...the skull cache.

TripCyclone

Thursday, October 8, 2009

It's Locked! - Graphical TB Links

I promised to provide information on how to create Graphical Links for travel bugs as seen in my I Lost My Keys cache.  Unfortunately, this will require some knowledge of HTML programming (a common programming language for building basic websites).  However, my hope is that this article will help even the most HTML-illiterate geocacher.  We'll start by showing you one of the Graphical Links from my I Lost My Keys cache.


There are four parts to this process:
  1. Have a posted Travel Bug photo on the Travel Bug page
  2. Identify travel bug reference number & GUID
  3. Prepare the HTML code
  4. Insert into desired page (whether profile page, cache page, or elsewhere)
Before we begin, let's review a few basic HTML codes that will be used:

  • <a href="">  -  This is the opening code for making a clickable link
  • </a> - This is the ending code for making a clickable link
  • <img src=""> - This is the code for posting a picture

And some extra codes that you can use:
  • <p> - This is the opening code for a paragraph
  • </p> - This is the closing code for a paragraph (using these separates the link from the surrounding text by adding a blank line before and after the graphic)
  • <br> - This code is the HTML equivalent of hitting the ENTER key.
Okay, now let's go through each of the four parts.  We will start with the necessary photo.  For the graphical link to work, there needs to be a Travel Bug photo in place.  If there isn't, it will merely show a smiley face.  If you do not have a photo online yet, but you have a photo of the travel bug, go to the travel bug page.  On the right side of the screen, you'll see this:

Click on "Upload an Image" to bring up another screen.  From that screen, you can browse your computer to find a photo (I'll leave any editing to the photo up to you...just make sure the tracking number on the tag is not visible).  Before you click the upload button, make sure you checkmark the box above it that is labeled "Make this the default image for this Travel Bug".  This will insert the image into the travel bug page. 

If you do not have a photo, but somebody has taken a photo and posted in their log, you can also use that (make sure they are okay with you doing that first).  To do this, go to your travel bug page and on the same menu in the image above, click on "Edit this item".  On the screen that comes up, there will be a box for the "Bug Image".  Click on the arrow on the right side of this box and it will pull up a list of the images that have been posted that Travel Bug's logs.  Click one, then click on "Submit Changes".  Now you're travel bug has an image.


Step two...the reference number and GUID.  One of these is easy, the other might seem hard...but it's not.  Go to the travel bug page.  The reference number is right at the beginning, at the bottom of the basic Travel Bug information at the top of the screen.  It's even listed in bold.  Write down the "Reference Number" for later.

Now let's find that GUID.  The GUID is a 32 digit ID code.  Every cache, every travel bug, every geocoin has one.  It's really easy to find, but it seems like a lot of steps.  Follow these instructions and you'll have it in only a few minutes.  These steps should be very similar no matter what browser you are using.  The only variation will be where the option in Step 3 is located.  The instructions are for Firefox.

  1. Go to the desired Travel Bug page.
  2. Go to your browser menu and click on "View"
  3. Scroll down and click on "Page Source"  (this will open a new window with lots of programming language
  4. Hit F3 (this pulls up the search option)
  5. Type in "GUID", and hit enter or "Find" if needed.  (Firefox will go straight to it as you type)
  6. Next to the highlighted "GUID" is an equal sign.  Following that is a length of letters and numbers followed by a quotation mark. Highlight everything BETWEEN the equal sign and the quotation mark.  Don't highlight those two symbols.
  7. Hit CTRL-C when it is highlighted (or click "COPY" in your browser's "EDIT" menu).
  8. Open up Notepad, or Wordpad, or something else to paste the text too.
  9. Hit CTRL-V in whatever program you open (or click "PASTE" in your browser's "EDIT" menu).
It's rather simple, just a lot of steps.  After doing this a number of times, I can find and copy a GUID in a matter of about 30 seconds.


Now it's time to get the HTML code put together.  We'll start with what the overall code will look like to give you a reference for how to alter it.  The code will look something like this in the end, with a few differences to the parts in bold:
<a href="http://www.geocaching.com/track/details.aspx?tracker=TB2AF6Y">
<img src="http://img.geocaching.com/stats/tb.aspx?guid=91ae86a8-a75b-49e7-80a3-9cf73c269d92"
     alt="" /></a>

Now for the update to make this work for your item.  In the first line, delete the part that says TB2AF6Y and replace it with the "Reference Number" you wrote down.  If I wanted to switch it to my Chocolate Racer TB in the above image, I would replace it with TB2AF6T (notice how it's the bold number at the bottom of the image).

Now let's alter the second line.  As you might of guessed, this is where you will insert the GUID number you got earlier.  Just erase the part in bold above and paste in the GUID for your item.

Your code is now ready to go.  Remember the example of the final product I provided at the beginning of the article...here is what it looks like after changing just those two things:
<a href="http://www.geocaching.com/track/details.aspx?tracker=TB2AF6T">
<img src="http://img.geocaching.com/stats/tb.aspx?guid=c06abb70-7453-4286-9287-794e873aa7b1" alt="" /></a>
Which produces:


Time for the final step.  After switching out the numbers above, copy the entire section of code.  Now go to wherever page you want it displayed at.  If on the Geocaching website, you'll need to "EDIT" the item, whether it's your profile page or the cache page.  Just select on the part that says "Edit this ____".  Since we are talking about this with reference to a geocache, the instructions are tailored to that approach.

On the cache page, you have the list of options on the right side just like on the Travel Bug page.  Click on "Edit Listing" to pull up the page for altering your geocache.  Scroll down to the "Details" part, where there will be two dialog boxes.  One is labeled "Short description" and one is labeled "Long Description".  Most likely, you'll put this graphical link into the Long Description part.  Scroll through everything in this box until you find the spot in the text you want to display the graphic.  Click on that spot and paste the code you prepared in the previous step.  If you want a blank line before and after it, just add a <p> before <a href=  and a </p> after the </a>.  It should look like this:

<p>
<a href="http://www.geocaching.com/track/details.aspx?tracker=TB2AF6T">
<img src="http://img.geocaching.com/stats/tb.aspx?guid=c06abb70-7453-4286-9287-794e873aa7b1" alt="" /></a></p>

One last thing.  Before you submit the update to the cache page, scroll up to the "Short Description" box.  Just above that is a checkmark box that says "The descriptions below are in HTML".  Make sure that you put a check in that box.

Now go hit submit.  Check your cache page and it should have the graphic on the page.  Congrats.  You've just included a cool link to a travel bug.  I like this for several reasons.  It's more splashy looking.  It displays the current location of the travel bug, and it displays the distance traveled.  For the Locked Ammo can design, this is a great way for people visiting the cache page to quickly get an idea of which keys are in travel bugs (the graphic displays a box), and which ones are in the hands of geocachers (displays a smiling face).


Enjoy.

TripCyclone

Tuesday, October 6, 2009

It's Locked!

Many geocachers love finding larger caches. There's room for trackables and swag. They are sometimes easier to find. You often find them near trails so it feels more wild. Oh, and it feels more like a treasure.

To go along with the idea of being more like a treasure...why not lock the ammo can?

That's right, I said lock.

I first thought of the design after a fellow geocacher mentioned the idea to me back in 2008. He worked out some details and placed a cache called 
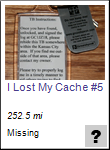
Where's my Keys. Later on, I tried the idea myself by placing I Lost My Keys.  The design is rather simple, but requires some work to set up.

Required items:
  • Ammo can
  • Hasp
  • Padlock (must require a physical key)
  • Power drill
  • Drill bit for drilling metal
  • Extra keys for the lock
  • Photo keychains (preferably clear)
  • Superglue
  • Travel Bugs
These supplies are very specific so let's explain a bit.  This is especially true with the hasp/padlock part of it.  A hasp, for those who aren't hardware oriented, is a device used for fastening.  Usually consisting of two parts, they are commonly metal and hinged.  Part one contains the hinge with a hole at one end of the device. Part two is the fastener that fits in that hole.  Hasps can be found with a lock integrated into the device, or the fastener is merely a large staple through which you would insert a pin or attach a padlock.  It is possible to find hasps that are all one piece.  DO NOT USE ONE PIECE HASPS!

For our design, you can use either type of hasp.  I prefer the kind that has the lock integrated into the design.  This eliminates the need for a padlock.  If you do use the kind that would require a padlock, it is ESSENTIAL that you use a padlock that requires a seperate key and not a combination.  You'll see why later. Here is an example of both types, first with one that would require a padlock and second with one that integrates a lock:


You can find hasps at most hardware stores, and even in hardware departments of stores like Target and Wal-mart, though what they may carry will vary from store to store.  Once you've decided on what kind of hasp to use, you'll need to make sure you have a power drill and a drill bit that can drill through metal.  If you have a power drill but don't have the right drill bit, here's a suggestion for those who don't want to buy a whole set of metal drill bits.  Compare the drill bits for your drill with the size of the hole on the hasp to determine what size you need.  A single drill bit can be purchased for a few bucks or less.  Knowing the right size will save you time and money in the end.

For the photo keychains, I like a brand found at Wal-mart, but you can find these at various stores.  In the photo frame section of the store, look for photo keychains.  They carry two types.  One is black and one is clear.  Purchase the clear one.  The black ones are not clear on the back of the keychain, which will be a factor as you'll see later.  You'll need one keychain for each key you make...it will make more sense later (I promise, I'll get to all these "you'll see later" parts).

Once you have all the parts, it's time to put everything together.  You'll need the drill, drill bit, hasp, ammo can, and preferably something to mark the ammo can with (like a sharpie).  Here's how you will attach the hasp.  The hinged part will be attached to the lid of the ammo can.  The fastener will be attached to the side of the ammo can.  Make sure you drill and attach the hinge first.  Let's repeat that:

MAKE SURE YOU DRILL AND ATTACH THE HINGE FIRST!

Okay, don't say I didn't warn you when you attach the fastener, THEN drill and attach the hinge only to have alignment off and you can't properly connect the two. I learned the hard way. :)

Now for the delicate part about attaching the hinge. When you line up the portion of the hinge you will actually attach to the lid, you DO NOT want to drill the two holes closest to the edge of the lid.  If you do, they will drill through the rubber O-Ring on the inside of the lid.  Go ahead, open the lid.  See that rubber ring around the edge?  It helps to provide a watertight seal.  If you drill through that, not only do you risk a leak if you don't seal it up properly, you also will be unable to close the ammo can once the bolts are in place.  I know because I made that mistake too.  See all the learning you can gain from my mistakes.  There are also two ways to position the hinge.  Make sure the hinge is positioned outwards.  Heck, go head and line the hinge up.  are the two pieces flush against the sides of the lid?  If not, flip it over...now it should be.

Drill the holes, line up the hinge, bolt it down.  Good.  Now for the fastener.  For this part, line up the fastener in the right spot and close the hasp.  Now, carefully open the hasp without moving the fastener.  Push the sharpie (or pencil/pen/whatever you are using) through the bolt holes to mark where to drill. Now remove the fastener and carefully, very carefully, drill the holes in the marked spots.

Once the holes are drilled, bolt the fastener down and test to make sure the hasp can be closed.  If you are using the kind with the integrated lock, make sure you can lock it shut.  If you've done everything right, it should lock into place without a problem.  With the hasp I used, the fastener has a part that twists to lock into place.  With this kind, you might have to gently push down on the hinge to twist the lock.  Here is what it should look like in the end:
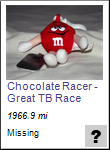
There, you've now built a locked ammo can.  Now to take care of the keys.  The plans for this geocache are to release travel bugs with the keys that will unlock the ammo can.  To get the key, geocachers have to find one of the travel bugs.  Geocachers can find the ammo can all they want, but without the key, they won't be able to sign the logbook and claim a find.  For an added touch, you can list bogus coordinates on the cache page and hide the ammo can at a seperate location.  Then attach the true coordinates to the keychain.  Not only is the travel bug key needed to unlock the cache, but it's also needed to learn the final location of the hide.  Also remember that when you classify this cache, it's best to consider it under the "Mystery/Unknown" category.  This is due to the added step of having to find the travel bugs to both get the final coordinates and to open the cache.

Before you do this step, you need to know how many keys you want to release.  Considering I placed mine in Kansas City, and due to the size of Kansas City, I released five travel bugs.  I'd recommend a minimum of three, and not more than six unless you live in a large, high population area. You will also need to make sure you have a travel bug for each keychain.  This will require that you've planned ahead if you want to release this soon after placing it.  Last of all, if you going for that added touch I mentioned and hiding it in a location other than the listed coordinates, you will need to have done that and taken coordinates before building the keychain.

Here's where the part about getting the clear keychains comes into play.  You'll likely want to place a restriction on the area of movement for the travel bugs.  This is so somebody doesn't pick it up and take it halfway across the country.  You will also want to put some instructions explaining what the travel bug and key is for.  Then, if you do the "added touch", you'll need to list the true coordinates.  With all of this, having a clear keychain allows you to have text on both sides of the keychain as opposed to just the one side you'll have if you use the black keychains.

I typed up my information, but you can do whatever you would like.  Just make sure what you prepare will fit into the keychain.  Once you have the information ready, just pop out the little cover on the keychain and cut the information sheet to fit inside.  Here is the one thing I noticed.  Since it is rather easy to pop this piece out, it also means it isn't too hard for water to get in it.  If the travel bug is placed in a cache that isn't so dry, you have a problem.  To counteract this, use superglue to seal this piece in.  This does mean that if you have to get the travel bug and fix it that you will need to completely remake the keychain, but if done right you won't need to do that.  Once everything is ready, attach the travel bugs and keys.  You are now ready to go.  Here is what it will look like:

Let's look at the cache and TB page itself.  For the TB page, just repeat the instructions listed on the keychain, minus any "final coordinates" that might be listed.  I'd also provide a link to the cache page so people can check things out if they happen to go to the TB page first.  For the cache page, make sure you link to each travel bug so that anyone visiting the cache page can quickly check on where the travel bugs are at.  If you visit the version of this design I placed (GC1JZ18), you'll likely notice the graphical links to each travel bug page.  Those are a nice addition to the page because they will display the current location of the travel bug.  They aren't too complicated and only require a bit of coding to incorporate them into the page.  Even though it isn't a cache, I'll add that to the list of things to write an article about as it does help spice up a cache listing.

There, you're all done.  All you need to do is get the cache published and release the travel bugs.  When submitting the cache, make sure to add a note for the reviewer so they understand how this works.  Then, enjoy the logs.  So far, most everyone who has found mine has enjoyed the design.  It catches people's attention and forces them to pay attention to where the travel bugs are.  It's kind of fun watching for those logs that read something like "Finally was able to get this travel bug.  On to the cache."

There are different ways to design this that don't involve an ammo can.  If you have built something like this, or seen something like this, post a comment with the GC # for others to see.

Check back later this week and I'll post a short article on how to set up the graphical links.

TripCyclone